Leveling up your Twitch chat bot with Moobot Assistant
Moobot Assistant is a desktop app which helps you level up your bot by using your computer in a way that is just not possible through your normal browser.
This lets your bot use local files directly with your OBS or XSplit streaming software, keyboard hot-keys which work even across windows and in full-screen, and much more!
The dashboard on your Moobot Assistant app works just like your normal dashboard, but has all its additional benefits!
- Keyboard hot-keys to operate your Moobot while remaining in your other apps and games (full-screen included.)
- Local files updated in real-time with data which you can use in your broadcasting software (like OBS or XSplit.)
- A more streamlined interface without the usual browser clutter.
Installing Moobot Assistant
Follow these steps to download and install Moobot Assistant:
- While on your dashboard, open up the
«More»menu from the main menu, then open the«Moobot Assistant»menu from there.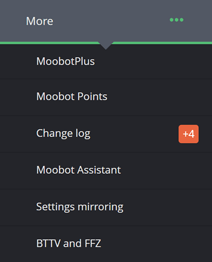
- While in the
«Moobot Assistant»menu click the appropriate«Download for...»button at the bottom of the menu, downloading the one meant for your operating system (either Windows or macOS.)
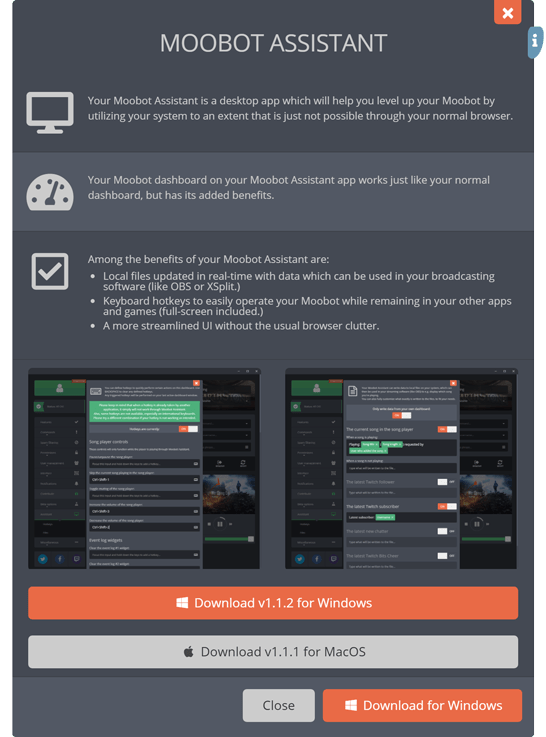
- Download the file to your local file system.
Installing on Windows
- Run the downloaded file from the previous step.
- You may get a pop-up titled
«Windows protected your PC»as the file is an unknown file. Click the«More info»label, and then the«Run anyway»button.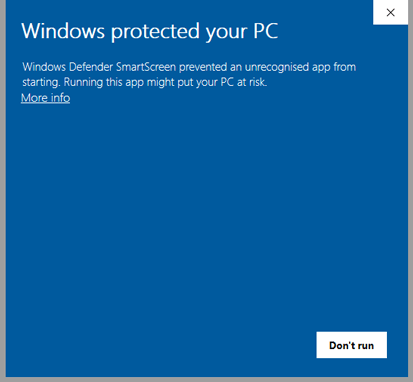
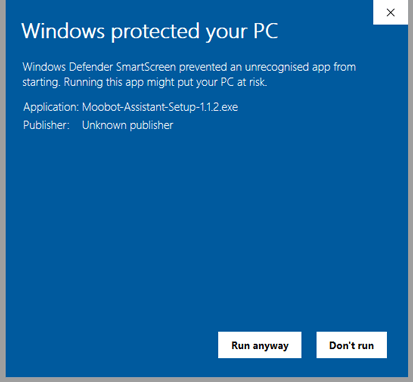
- The installer will now download Moobot Assistant and install it for you.
- Once you have completed the installation, Moobot Assistant will open automatically, and you will see the main page of Moobot.
- Log in to Moobot as normal.
- Once on your dashboard you should now have access to the
«Assistant»menu in the main menu!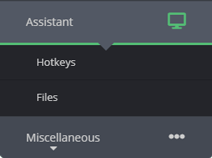
Installing on MacOS
- Open the downloaded file from the previous step.
- Follow the instructions in the window by dragging the
«Moobot Assistant»app to your«Applications»folder.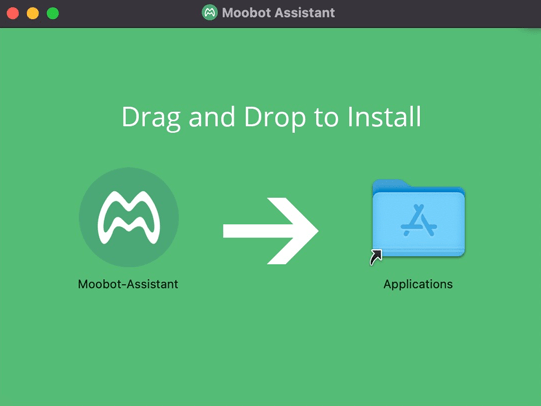
- Wait until the app has been copied to your
«Applications»folder.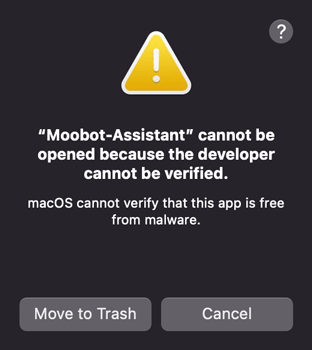
- Open Finder, then open the
«Applications»folder. - Find the
«Moobot Assistant»app, right-click it, and select«Open»from the context menu.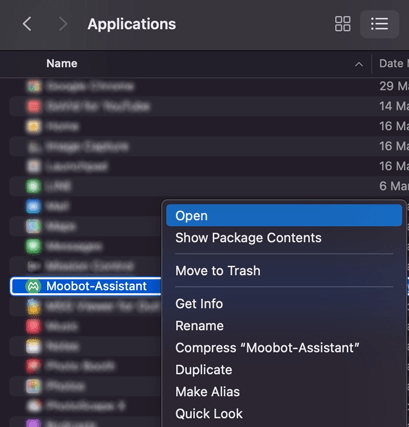
- You will get a confirmation saying
«MacOS cannot verify the developer of Moobot Asssitant. Are you sure you want to open it?». - Click
«Open»to open Moobot Assistant.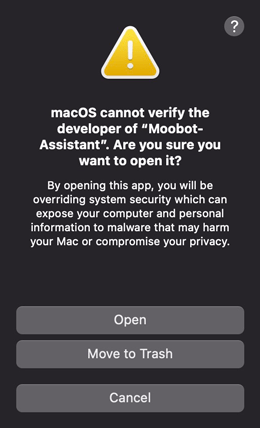
- Moobot Assisstant will now open, and you will see the main page of Moobot.
- Log in to Moobot as normal.
- Once on your dashboard you should now have access to the
«Assistant»menu in the main menu!
Speeding up your workflow with hotkeys
Keyboard hot-keys can perform certain actions, speeding up your workflow by avoiding unnecessary mouse clicks.
You can use your hot-keys while you're in other apps and games, including when you're in full-screen.
When you use a hot-key, it will be for your previously opened dashboard window.
Follow these steps to set up a hot-key:
- Open up the
«Assistant»menu from the main menu, then open the«Hotkeys»menu from there.
- Activate the toggle button at the top of the menu, enabling the use of hot-keys.

- Focus on any of the inputs you want to set a hot-key for. (Its label describes what the hot-key is for.)

- While focused inside the input, press and hold a key combination on your keyboard. Use e.g. CTRL, ALT, or/and SHIFT, in combination with letter or number keys. This key combination will be your hot-key. E.g. the
«Shift+F»hot-key requires you to hold both the«Shift»and the«F»key on your keyboard.
- Save your hot-keys by clicking the
«Save»button at the bottom of the menu.
Try a different key combination if you're having trouble getting your hot-key to work as intended. Sometimes other apps on your system may interfere with your hot-key.
Hotkeys for your song player
You can use hotkeys to better manage your song player, avoiding changing the window and clicking the buttons inside the player.
Just add a hotkey for any of these actions:
- Start the song player.
- Pause/un-pause the song player.
- Skip the current song playing in the song player.
- Toggle muting of the song player.
- Increase the volume of the song player.
- Decrease the volume of the song player.
- Add the current song playing in the song player to the secondary playlist.
- Blacklist the user and the song playing in the song player.
Hotkeys for sending chat commands to Twitch chat
You can use hot-keys to send any of your custom chat commands to Twitch chat, avoiding having to type the command in chat to send it.
Just add a hot-key for «Run custom command ... in chat» and select the command you want the hot-key to send to Twitch chat.
Hotkeys for dashboard navigation
You can use hot-keys to open up your dashboard, or a different dashboard you're an editor on, avoiding navigating through the taskbar menu of your Moobot Assistant app every time you need to use the dashboard.
The hot-key will focus the dashboard's window if it's already opened.
Just add a hot-key for any of the actions in the «Assistant, dashboards» section of the hot-keys menu.
Hotkeys for interacting with dashboard widgets
You can use hot-keys to interact with certain dashboard widgets, avoiding switching to the dashboard window and clicking inside the widgets.
Just add a hot-key for any of these actions:
- Clear the event log widget.
- Clear the notification log widget.
Hotkeys for opening dashboard menus
You can use hot-keys to open menus inside the dashboard, avoiding having to navigate through the main menu.
Just add a hot-key for any of the actions in the «Menu controls» section of the hot-keys menu.
Hotkeys for running ads on Twitch
You can use hot-keys to run ads on your Twitch stream, avoiding changing the window and clicking a button to run the ad.
Just add a hot-key for the ad-durations you want in the «Twitch ads» section of the hot-keys menu.
Hotkeys for automatic Twitch ads
If you have auto-ads enabled you can use hotkeys to delay your upcoming ads, avoiding ads running at important moments in your stream.
Just add a hot-key for the delays you want in the «Automatic Twitch ads» section of the hot-keys menu.
Using real-time data from your bot in your broadcasting software
Moobot can write data in real-time to local files on your system, which you can then use directly in your streaming software, like OBS or XSplit, to e.g. display on-screen which song you're listening to.
You can also adjust the data written to the file, formatting it however you like.
Follow these steps to add a local file:
- Open up the
«Assistant»menu from the main menu, then open the«Files»menu from there.
- Find the type of data you want to write to a file, in its own section of the menu, and then activate its toggle button.
- (⁎) Focus an input inside the section and type what to write to the file. Use the tags in the drop-down to insert dynamic data into the written contents. Repeat this step for each of the inputs in the section.


- Click the
«Save»button at the bottom of the menu to save your changes.
(⁎) You can leave an input blank if you want the file to be empty for that specific state. E.g. when a song is not playing you may want the file to be empty, so it doesn't display any text.

You can navigate to your data files by clicking the «Open file location» button at the bottom of the «Files» menu.

Use the «Test write to file» buttons to test the various files to make sure they're working as intended.
Using your data file in OBS as on-screen text
Follow these steps to use your data file in OBS:
- Open up your OBS.
- Right-click inside the
«Sources»panel, select«Add»and then«Text (GDI+)».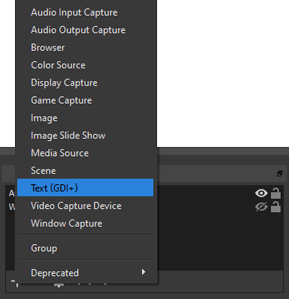
- Name your new text source, and click the OK button.
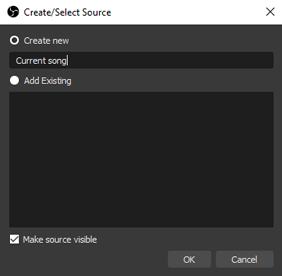
- Activate the
«Read from file»checkbox.
- Click the
«Browse»button at the end of the«Text File (UTF-8)»input. - Navigate to the location of your Moobot Assistant data files. (You can use the
«Open file location»button at the bottom of the«Files»menu in your Moobot Assistant to see the location.)
- (⁎) Select the file you want to display. Its contents will be the contents of your text source, and will auto update whenever the file updates.
- Click
«Open»in the dialog to add the file.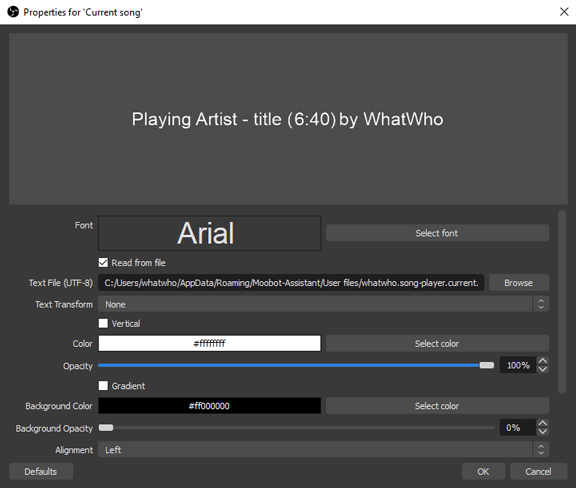
- (Optional) Adjust the other settings for your text source.
- Click OK at the bottom of the menu to save your text source.
- Move and adjust your new text source in your scene.

(⁎) If the location of your Moobot Assistant data files does not list your file, go to the «Files» menu and use the appropriate «Test write to file» button to create the file.
Displaying the currently playing song on-screen
Moobot Assistant can make data files for your song player, displaying on-screen what song is playing.
Just add a local file for the «The current song in the song player» section.
Displaying the latest engagements on-screen
Moobot Assistant can make data files for the stream's latest engagements, displaying it on-screen.
These engagements include the latest:
- Twitch sub.
- Twitch follower.
- User who Cheered with Bits in your Twitch chat.
- Raid from other Twitch streamer.
- User who chatted for their first time in your Twitch chat.
Just add a local file for any of these engagements in their section of the «Files» menu.