Sharing, reusing and backing up your Moobot settings
You can share your Moobot's settings to other Twitch streamers, use them on other dashboards where you're an editor, or back them up locally.
This also means you can import settings that others have shared with you. E.g. a special chat command someone has built.
Moobot's Import & Export menu gives you the tools to export your settings to a file, import from such an export file, or import directly from a dashboard where you're an editor.
You can also fully adjust which exact settings you import or/and export.
Exporting settings to a local file
Follow these steps to export settings to a local file:
- Open up the
«Tools»menu from the main menu, then open the«Import & Export»menu from there.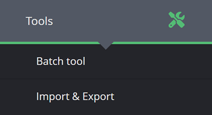
- Select the
«Export this dashboard to a file»option in the menu.
- Activate the checkboxes for the settings you want to export.

- Click the
«Continue»button at the bottom of the menu. - If an additional menu opens up, further adjust which settings you want to export, and then click the
«Export»button at the bottom of the menu.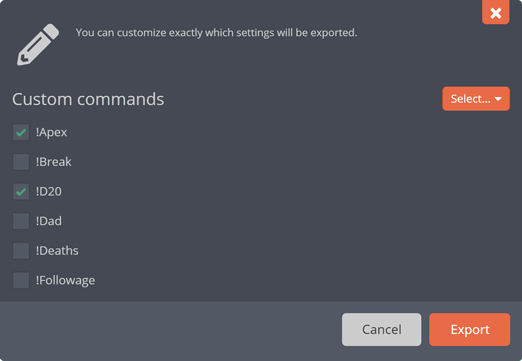
- In the dialog that pops up, navigate to the location where the export file will be saved on your local file system, and then use the dialog to save the file.
Anyone can import the exported file again by using the same menu, on your own dashboard or someone else's.
Importing settings from a different dashboard
You can import settings directly from a dashboard where you're an editor.
Keep in mind that your permission group must have access to view the specific settings on the dashboard you're importing from, and access to set the settings on the dashboard you're importing to.
Follow these steps to import settings from a different dashboard:
- Open up the
«Tools»menu from the main menu, then open the«Import & Export»menu from there.
- Select the
«Import from a different dashboard»option in the menu. - Select the dashboard you want to import from in the
«Select a dashboard...»input.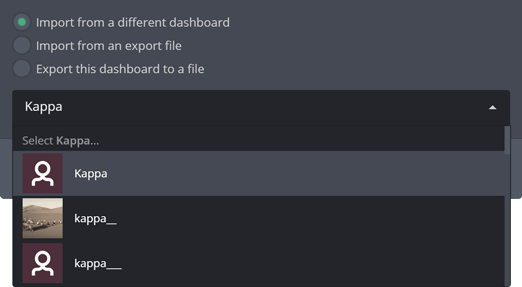
- Activate the checkboxes in the
«Settings to import»section for the settings you want to import.
- Click the
«Continue»button at the bottom of the menu. - If an additional menu opens up, further adjust which settings you want to import, and then click the
«Import»button at the bottom of the menu.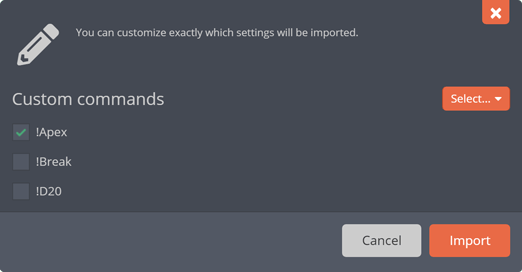
- If a confirmation pop-up titled
«Import?»opens up, choose whether to overwrite any duplicate settings by activating the«Overwrite any duplicate settings»checkbox. E.g. if the import has a chat command with a name that already exists on the dashboard you're importing to, the import will replace the command on the dashboard with the one in the import if you have activated the«Overwrite any duplicate settings»checkbox. Otherwise the import will skip the imported command.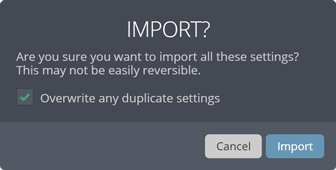
- If shown, click the
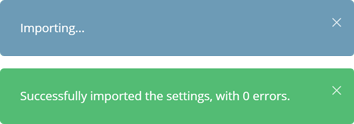
«Import»button in the confirmation pop-up. - Wait for the import to process, showing a notification that the import was successful.
Importing settings from a local file
You can import settings from any locally stored export file. Whether it's an export created by you or someone else.
Follow these steps to import settings from a local file:
- Open up the
«Tools»menu from the main menu, then open the«Import & Export»menu from there.
- Select the
«Import from an export file»option in the menu.
- Click the
«Select file...»button in the menu. - In the dialog that pops up, navigate to the location where the export file is stored on your local file system, and then use the dialog to open the file.
- Activate the checkboxes in the
«Settings to import»section for the settings you want to import.
- Click the
«Continue»button at the bottom of the menu. - If an additional menu opens up, further adjust which settings you want to import, and then click the
«Import»button at the bottom of the menu.
- If a confirmation pop-up titled
«Import?»opens up, choose whether to overwrite any duplicate settings by activating the«Overwrite any duplicate settings»checkbox. E.g. if the import has a chat command with a name that already exists on the dashboard you're importing to, the import will replace the command on the dashboard with the one in the import if you have activated the«Overwrite any duplicate settings»checkbox. Otherwise the import will skip the imported command.
- If shown, click the
«Import»button in the confirmation pop-up. - Wait for the import to process, showing a notification that the import was successful.
