How to use Moobot as your Twitch chat bot [GUIDE]
You can get your very own Moobot by signing up via Twitch - no registration required! On average, it takes just 6 seconds to get started.
Once you've signed up, you can manage your Moobot directly from your new dashboard. No need to download or install anything!
With just a few more clicks, your Moobot can start automating a lot of tedious tasks for you, removing unwanted and rewarding desirable behaviors, and encouraging engagement and loyalty from your community on Twitch.
This helps you focus your energy on engaging with and entertaining your community, building the exact community you want on Twitch, and increasing the engagements which lead to more Twitch subs and followers for you.
Getting started by signing up via Twitch
- To get started, navigate to https://moo.bot and click the
«Connect with Twitch»button to start the sign-up process.
- Twitch will ask you to allow Moobot to access your account. Click the
«Authorize»button to sign up via Twitch.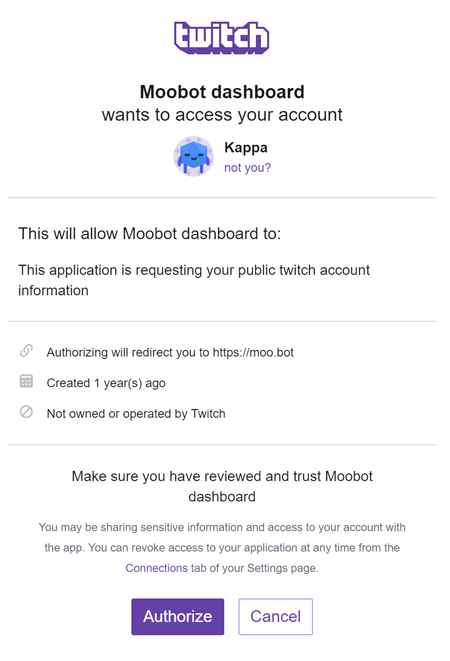
- Your browser should now take you to your brand new Moobot dashboard!

- Click the
«Take a quick tour to learn more»button at the bottom of the menu to take a quick tour of your new dashboard, showing off its various features and functionality.
Getting the Twitch bot set up in your Twitch chat
Your Moobot will be inactive until it set up as a moderator in your chat.

To make Moobot a moderator, click the green magic-wand-iconed «Resolve» button in the «The bot is not detected as a moderator in your chat» prompt, and then follow its steps to make Moobot a moderator in your Twitch chat.
Once completed, the bot should be fully operational in your Twitch chat!

Adding your first chat command to your Twitch chat
Chat commands help you minimize the effort you spend on repeating yourself, so you instead can engage with and entertain your audience.
You can start off by making a simple chat command that tells your community how to follow and reach you on social media. That way when you post that your stream is live, they'll know.
- First open up the
«Commands»menu from the main menu.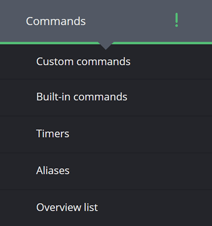
- Then open the
«Custom commands»menu by clicking its option in the«Commands»menu.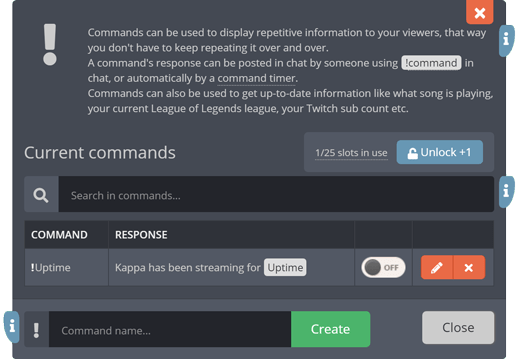
- Type in the chat command's name in the
«Command name...»input at the bottom of the menu, e.g.«Twitter», and then click the«Create»button.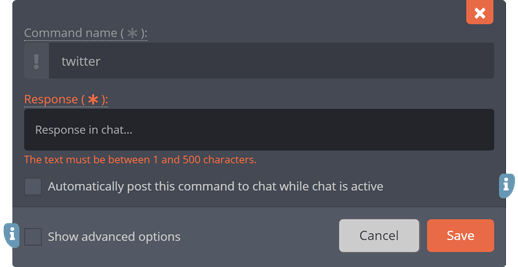
- Once in the edit-menu for your new
«!Twitter»chat command, find the«Response»input, and type the message you want the chat command to respond with in Twitch chat.
E.g.«Follow Moobot on Twitter.com/MoobotApp to see when they'll go live! 💜»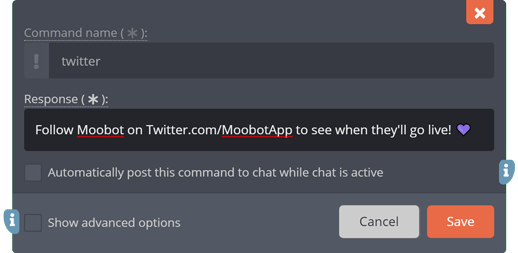
- Save the chat command by clicking the
«Save»button at the bottom of the menu.
Your «!Twitter» chat command should now be available in your Twitch chat!
Test it out by going to the Twitch chat on your dashboard, typing in «!Twitter» in the «Send a message» input, and then clicking the «Chat» button.
Click the «OK» button inside the confirmation dialog that pops up, allowing you to send chat messages from your dashboard.
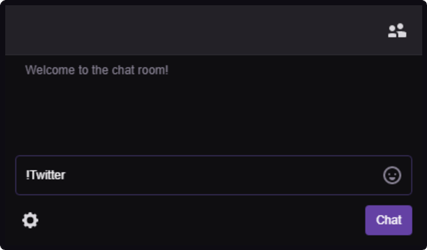
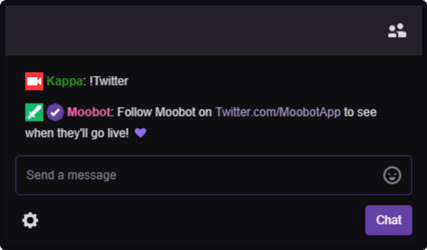
Your Moobot should now display your chat command's response directly in your Twitch chat.
Automatically posting a message to your Twitch chat
Moobot can auto post a message to your Twitch chat. You can use this to post some commonly used responses, for announcements, or to e.g. plug your social media.
Moobot will post messages through its timers, which will continuously post at a set period.
After you've added your first chat command, you can have Moobot post it automatically to your Twitch chat.
- First open up the
«Commands»menu from the main menu, then open the«Custom commands»menu from there.
- Find your chat command in the
«Current commands»table and then click the pencil-iconed«Edit»button in the command's table row.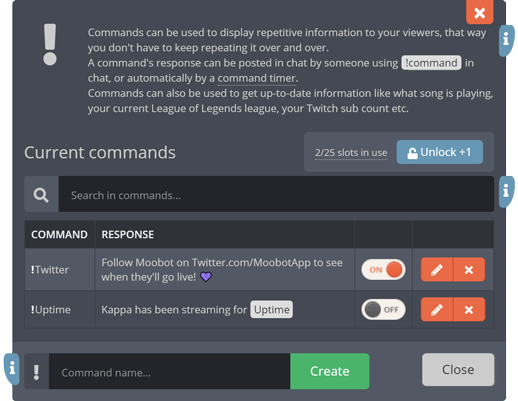
- Activate the
«Automatically post this command to chat while chat is active»checkbox to post it automatically to your Twitch chat.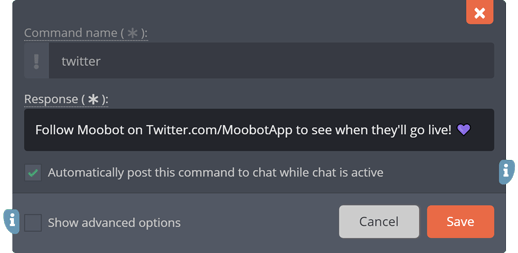
- Save your changes by clicking the
«Save»button at the bottom of the menu.
Your chat command should now post to your Twitch chat automatically as long as chat is active.
Adjusting the timer that is automatically posting to your Twitch chat
From the «Timers» menu, you can adjust the timer that is posting your chat command automatically.
- First open the
«Timers»menu from the«Commands»menu in the main menu.
- Find the timer in the
«Current timers»table, usually named«Default timer», and then click the pencil-iconed«Edit»button in the timer's table row.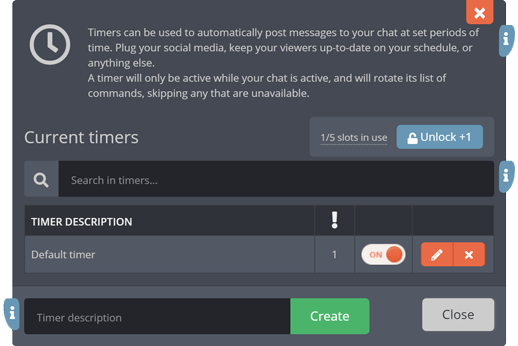
- Adjust the values for
«Minutes passed before posting»and«Chat lines passed before posting», and then click the«Save»button at the bottom of the menu to save your changes.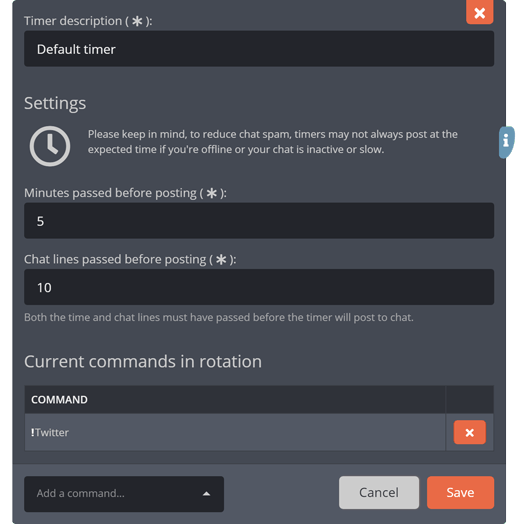
Removing undesirable comments in your Twitch chat
Moobot can act as your mod, auto-removing spam and undesirable comments in your Twitch chat. This helps you create the community you want on Twitch.
All of your Moobot's auto moderation options are fully adjustable to fit the needs of you, your Twitch mods, and your community on Twitch.
Moobot offers several built-in message filters to make your life easier.
Activate the filter and Moobot will automatically remove the filter's unwanted behavior from your Twitch chat.
- First open up the
«Moderation»menu from the main menu, and then the«Message filters»menu from there.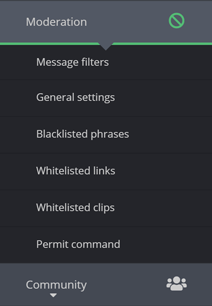
- Activate any of the built-in message filters by activating its toggle button.


Encouraging new Twitch subs and follows with engagement alerts
Moobot can automatically give recognition for several desirable engagements on Twitch.
This recognition encourages your viewers, which leads to more Twitch subs, followers, and engagement for you.
- First open up the
«Features»menu from the main menu, and then the«Chat notifications»menu from there.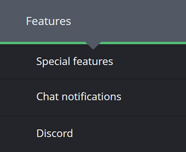
- Activate alerts for the engagements you desire by activating its toggle button, and your Moobot will then give recognition for these engagements in a public alert posted to your Twitch chat.


Changing your Twitch category and title directly from your dashboard
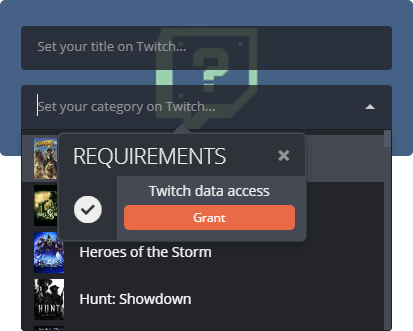
The stream widget on your dashboard lets you set the channel's Twitch category and title.
Adjust the title from its input, or set the category by searching for it and selecting it in the drop-down.
If asked, grant Moobot access to adjust your category and title by clicking the «Grant» button and then following its steps.
Get familiar with your Moobot
To further set up your Moobot, get familiar with it by navigating the different menus from the main menu, and look at the main documentation page for an overview of all its features and functionality.
The menus on your dashboard also have special buttons which will take you directly to the relevant documentation.
Click the button to open its documentation.

Some tips for your Moobot
- Put your Moobot dashboard directly into your OBS by adding it as a custom browser dock.