Automatic moderation for your Twitch chat
The Twitch bot can act as your mod, auto-removing spam and undesirable comments in your Twitch chat. This helps you create the community you desire on Twitch.
Moobot reduces the risk of unwanted behavior escalating in your Twitch chat by automatically removing chat messages with certainty and low latency.
When your Moobot puts a user in a timeout, it only removes them temporarily. This means they are always welcome back when they are ready to be a desirable member of your Twitch community.
All the auto moderation options of your Moobot are fully adjustable to fit the needs of you, your Twitch mods, and your community on Twitch.
- Using message filters to moderate Twitch chat automatically
- General settings for your auto moderation
- Restricting what someone can post in Twitch chat
- Removing blocked words, phrases and behavior from Twitch chat
- Letting pre-approved users bypass auto moderation
General settings for your auto moderation
Your general moderation settings offer you some special settings for your moderation, some of which override any settings you have adjusted for your filters and blacklisting.
By adjusting your general settings, you can avoid having to adjust several individual settings in their own menus.
Just follow these steps to adjust your general settings:
- Open up the
«Moderation»menu from the main menu, then open the«General settings»menu from there.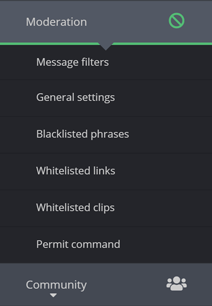
- Adjust the settings to fit your needs.
- Click the
«Save»button at the bottom of the menu to save the settings.
Announcing your auto moderation rules in Twitch chat
The Twitch bot can automatically announce in your Twitch chat when someone breaks your rules.
By announcing when and why someone is removed from your Twitch chat, you make everyone aware of your rules and the consequences for breaking them.
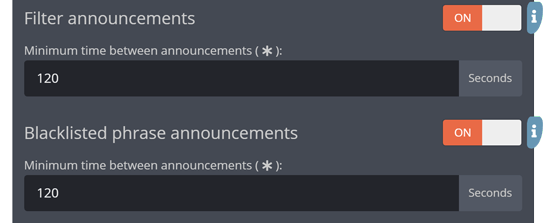
You can disable these announcements in the «General settings» menu by deactivating the toggle button for «Filter announcements» and/or «Blacklisted phrase announcements».


Each of your filters have their own announcement, with the minimum cooldown time between announcements being bound to each individual filter.
To adjust the minimum time between announcements, adjust the «Minimum time between announcements» value.
Excluding special Twitch chat messages from auto moderation
You can exclude certain special messages from your auto moderation, like Twitch re-sub alerts and chat messages with Bits.
For your blacklisting you can exclude these special messages in the «General settings» menu by activating the «Exclude Twitch subscription announcements» and/or «Exclude messages containing Twitch Bits» checkboxes in the «Blacklisted phrase whitelist» section.
You can also adjust the amount of Bits required to exclude the chat message, by adjusting the «Minimum amount of Twitch Bits to exclude» value.
For your filters you will need to adjust a filter's individual settings to exclude these special messages.

Adjusting how Twitch chat messages are removed
Twitch chat will sometimes lag and not properly hide chat messages that your Twitch chat bot removes.
This happens because your Twitch chat bot removes the message so fast that Twitch chat cannot keep up with it.
To avoid having some already removed messages appear in your Twitch chat, you can have your Twitch chat bot remove messages twice. Once instantly and once delayed.
Unfortunately, removing messages twice also means your moderator logs will display the timeout twice.
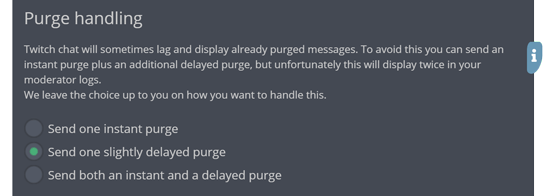
You can adjust this behavior in the «General settings» menu by adjusting your selection in the «Purge handling» section.
You can choose between these options:
- Send one instant purge.
- Send one slightly delayed purge.
- Send both an instant and a delayed purge.
The choice is up to you on how you want to handle this.
Auto-adjusting moderation to be more lenient during Twitch raids
When a Twitch raid happens your Twitch chat may become unusually disorderly.
While this disorderly behavior normally would be undesirable, you can temporarily allow some extra excitement throughout the duration of the raid.
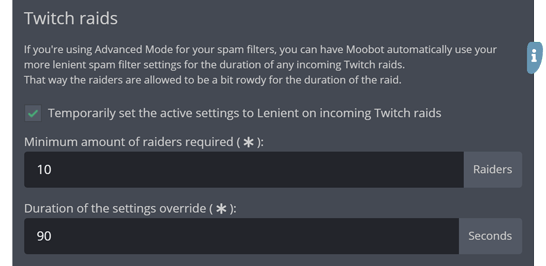
By activating the «Temporarily set the active settings to Lenient on incoming Twitch raids» checkbox in the «General settings» menu, the Twitch bot will use your custom «Lenient» type settings for each of your individual filters for its auto moderation.
Keep in mind that these custom «Lenient» type settings are only available when you have set up your filters with Advanced Mode activated.
Adjust the «Minimum amount of raiders required» value to avoid abuse, and the «Duration of the settings override» value for how long you want to allow the disorderly behavior.
Seeing what is being removed by your auto moderation
You can use the event log widget to see what is being removed by your auto moderation.
Just activate the «Removed messages» option in the «Display» menu for the widget.
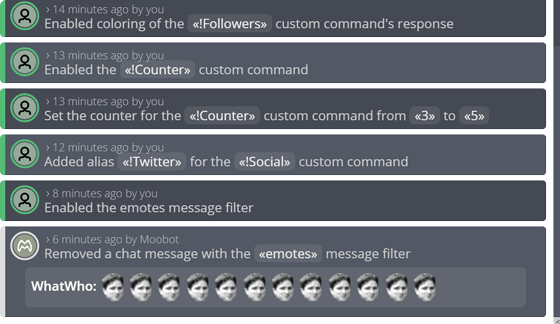
If you have the Community Loyalty feature enabled, the log entry will also display how long the removed user has been watching the stream. This can help you decide if you need to take further action.

Letting pre-approved users bypass auto moderation
Sometimes you want to let a user post a relevant link, or a relevant large copy-pasted text in Twitch chat, while removing any other such chat messages.
Your community members can @mention or whisper you or your Twitch mods to ask for approval, and you can decide for yourself whether to accept or deny their request.
Pre-approving users via the dashboard
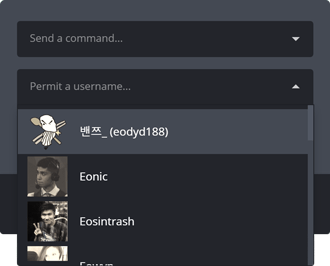
Users can be pre-approved to bypass auto moderation by searching and selecting the user in the «Permit a user» input in the controls widget on your dashboard.
Pre-approving users via Twitch chat
Twitch mods can pre-approve users to bypass auto moderation by typing «!permit Username» in Twitch chat, where «Username» is the username of the user you want to pre-approve.
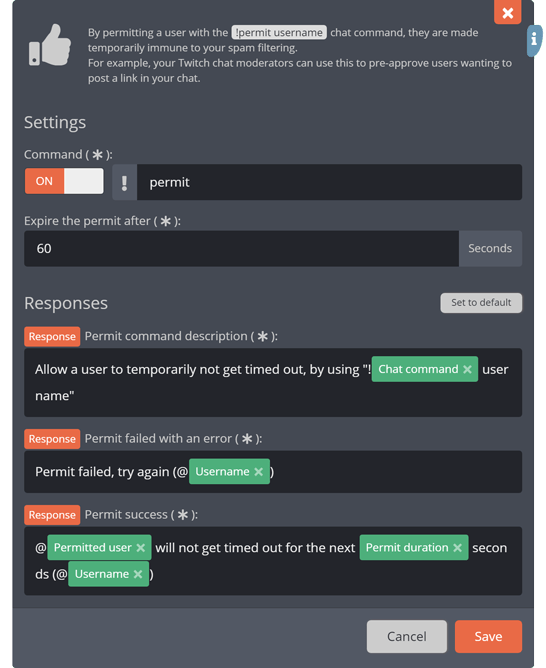
The «!permit» chat command is a built-in chat command, and you can adjust it by following these steps:
- Open up the
«Moderation»menu from the main menu, then open the«Permit command»menu from there.
- Adjust the settings to fit your needs.
- Click the
«Save»button at the bottom of the menu to save the settings.