Using polls on Twitch for increased engagement
You can use polls to interact with your Twitch community, to increase their engagement, and even encourage them to sub by e.g. giving subs additional votes.
Your community only has to send a message to Twitch chat to make their vote - which is something everyone on Twitch can do! Including your community watching you from a mobile device.
Engagement increases drastically by making it so easy to vote, while creating extra hype with the increased engagement being shown directly in Twitch chat.
Setting up and managing your polls is also quick and easy on your side - all done through your dashboard. Your Twitch mods can also fully manage your polls, helping you free up your hands.
You can also copy, re-do, export and import your polls. That way you can quickly get them going while you're live, avoiding any dead air or waiting.
Making a poll on Twitch
Follow these steps to make a poll:
- Open up the
«Community»menu from the main menu, then open the«Polls»menu from there.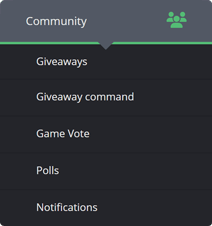
- Click the
«Create poll»button at the bottom of the menu.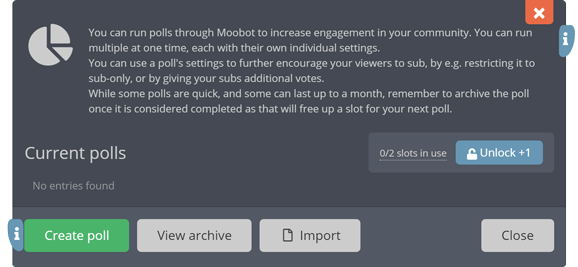
- (Optional) Adjust the description of the poll in the
«Poll description»input. E.g.«Tomatoes or Apples?». - (⁎) Type in the vote options of your poll in the
«Vote options»input. To add a vote option, click the«Add option...»selection, or press the«ENTER»or«,»key on your keyboard. E.g. if your poll was«Tomatoes or Apples?»the two vote options would be«Tomatoes»and«Apples».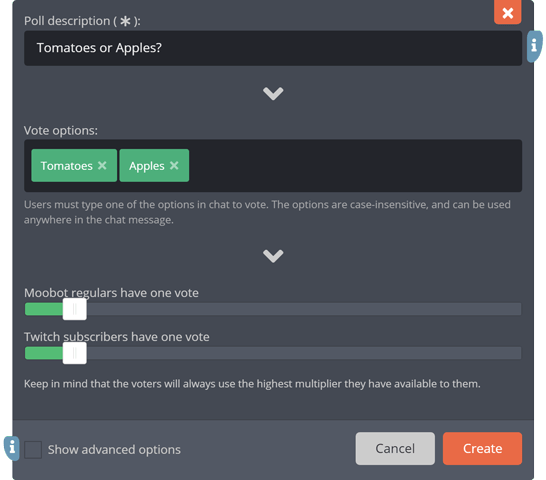
- Click the
«Create»button at the bottom of the menu.
Your poll is now active, and your viewers can type any of your vote options (⁎) as a message in Twitch chat to vote in the poll.
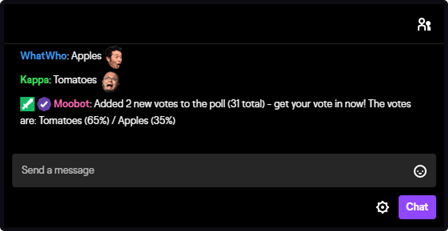
To let your viewers know that the poll is open, click the megaphone/bullhorn iconed button labeled «Announce that the poll is open» to post an announcement message to Twitch chat.

Adjusting advanced options for your polls
You can adjust more advanced options while making your poll by activating the «Show advanced options» checkbox at the bottom of the menu.

Encouraging Twitch subs with polls
You can restrict voting to only your Twitch subs or long-term subs, or give your Twitch subs extra votes in your polls. You can even give additional votes for your long-term Twitch subs by using Moobot's Tier system.
This can act as a big encouragement for your viewers to sub to you on Twitch and reward the loyalty of your current subs.
Running your poll
There are several ways to run your poll, but here is a basic one:
- Make your poll (off-screen if possible.)
- Once you've made the poll, the dashboard should take you to the management menu, which displays the current results of your poll.
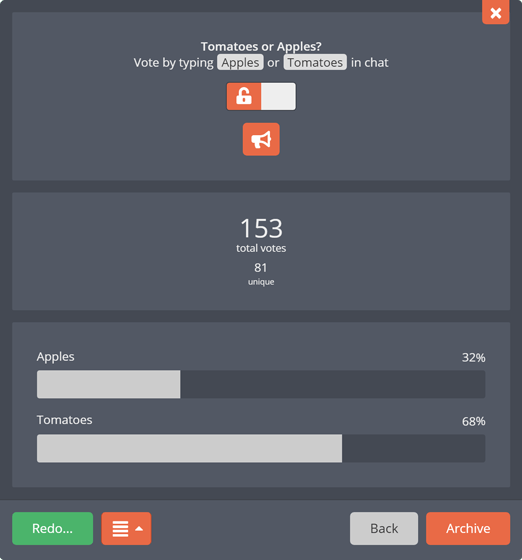
- Screen capture the management menu so that your viewers on Twitch can get a visual representation of the poll results.
- Keep clicking the announcement button to let your viewers know how to enter their vote.

- Wait for the votes to come in.
- Announce the result of your poll when you feel the poll has completed.
- (⁎) Click the
«Archive»button in the bottom right corner of the menu.
(⁎) You can also close the poll first by deactivating the lock iconed button, then clicking the button for announcing that the poll has been closed. That way you lessen the votes filling up Twitch chat after the poll has completed.


Archiving completed polls
While some polls are quick and some can last up to a month, remember to free up space for your next poll by archiving your completed ones.
Follow these steps to archive a poll:
- Open up the
«Community»menu from the main menu, then open the«Polls»menu from there.
- Find your poll in the
«Current polls»list and click the«×»button labeled«Archive poll»in the poll's table row. - Click the
«Archive it»button in the confirmation pop-up.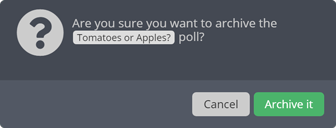
- Moobot has now archived your poll and freed up space for your next one.
Viewing your archived polls
Moobot keeps the results of your previous (100) polls in your archive, and you can view the archive by following these steps:
- Open up the
«Community»menu from the main menu, then open the«Polls»menu from there.
- Click the
«View archive»button at the bottom of the menu. - Find your poll in the
«Archived polls»list and click the eye iconed button labeled«View».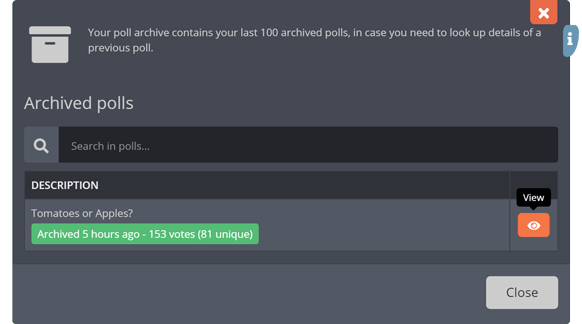
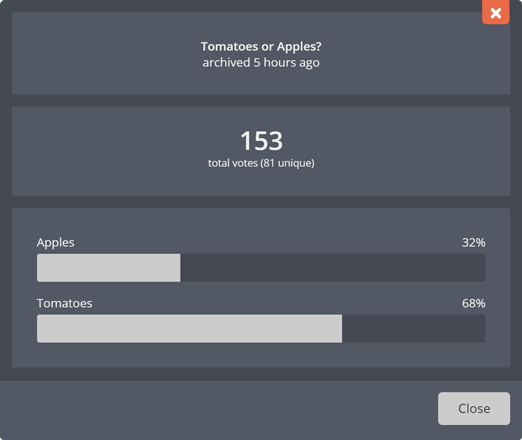
- A separate menu should now display the result of the poll.
Announcing your poll in Twitch chat
Your Moobot can do announcements in Twitch chat to let your viewers know how to enter their vote, and the current result of the poll.
If you've restricted who can vote, or given certain viewers extra votes, we recommend letting your community know about this in the poll's announcement messages.
Automatically announcing your poll in Twitch chat
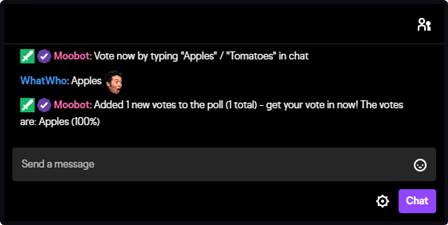
Your Moobot will make an automatic announcement to Twitch chat after one or more votes are entered.
This automatic announcement (as default) tells your viewers about the total votes, and the current results of your poll.
You can adjust the announcement in the «Vote announcement message» input, in the «Vote announcement» section of your advanced options.
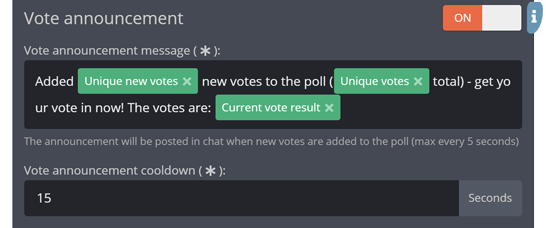
This announcement can happen max every 5 seconds, and only once within its set cooldown, which can be adjusted in the «Vote announcement cooldown» input, in the «Vote announcement» section of your advanced options.
You can also disable the automatic announcement by deactivating the toggle button in the «Vote announcement» section.

Manually announcing your poll in Twitch chat
You can make announcements manually through your dashboard by clicking the various announcement buttons, which Moobot will then post to Twitch chat..
In the management menu of your poll you will find the manual announcement buttons, labeled with a megaphone/bullhorn icon.

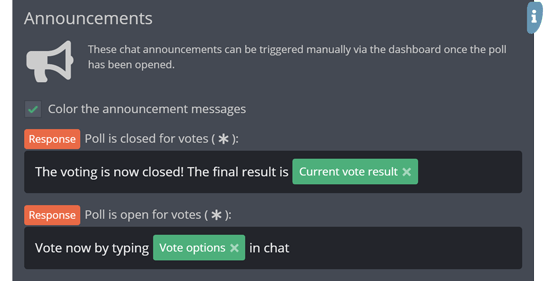
This announcement posts to Twitch chat, and (as default) tells your viewers how to enter their vote when the poll is open, and that the voting is closed once the poll is closed.
You can adjust these announcements in the «Announcements» section of your advanced options.
Restricting who can vote in your poll
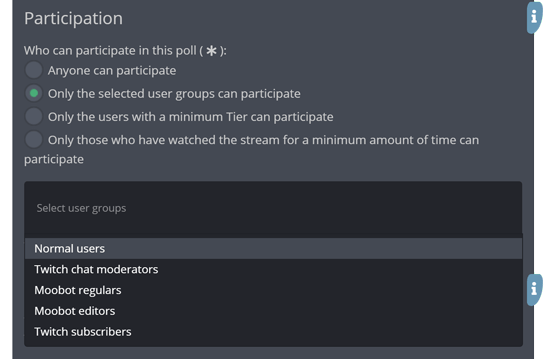
You can set who exactly can vote in your poll by adjusting the «Participation» section of your advanced options.
In the «Who can participate in this poll» input you can choose between these options:
- The
«Anyone can participate»option, where there are no requirements for voting. - (⁎) The
«Only the selected user groups can participate»option, where only the chosen user groups in the«Select user groups»input may vote in your poll. You can select one or more groups from these user groups:- Normal users (any users)
- Twitch mods
- Moobot regulars
- Moobot editors
- Twitch subs
- The
«Only the users with a minimum Tier can participate»option, where only viewers with an equal or higher Tier than the chosen Tier may vote in your poll.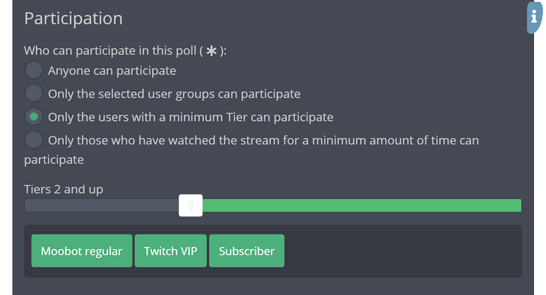
- The
«Only those who have watched the stream for a minimum amount of time can participate»option, where only viewers who have watched your stream for a minimum amount of time may vote in your poll. You can adjust the minimum amount of minutes watched in the«Minimum amount of time watched»input.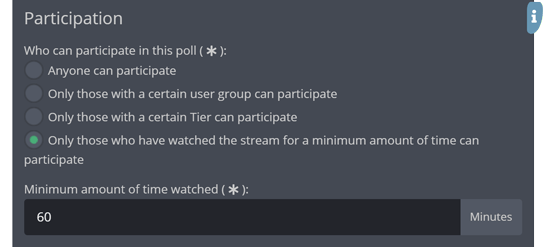
(⁎) The viewer only has to be in one of the user groups to participate.
Giving certain viewers extra votes in your poll
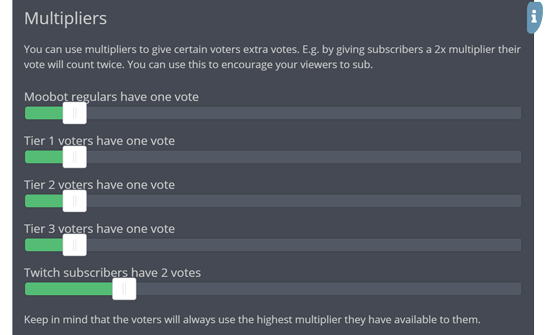
You can use vote multipliers to give certain viewers extra votes in your poll.
By e.g. giving a 2x multiplier to your Twitch subs, their vote counts twice.
A multiplier can be from 1 (none) to 10, and you can give a multiplier to your:
- Moobot regulars
- Twitch subs
- (⁎) Individual Tiers
(⁎) By setting up your Tiers properly you are e.g. able to give your long-term Twitch subs a higher multiplier than your new Twitch subs.
You can adjust the multipliers in the «Participation» section of your advanced options by dragging the accompanying slider to the desired multiplier.
Scheduling your polls
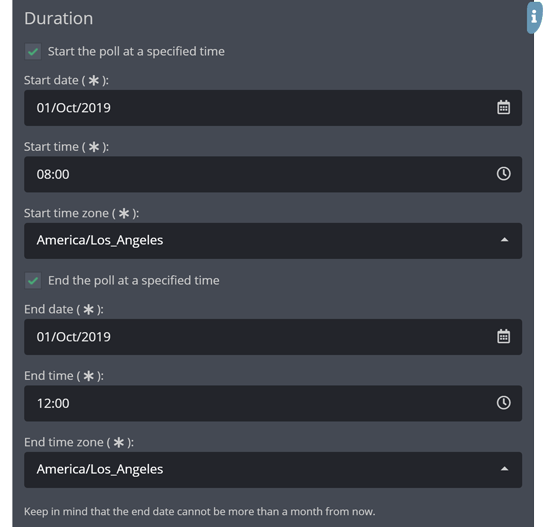
You can schedule your polls to only be open within a certain time period.
Activate and adjust the «Start the poll at a specified time» and/or the «End the poll at a specified time» inputs in the «Duration» section of your advanced options to schedule your poll.
Keeping your chat clean from votes
In some Twitch chats the extra hype from the poll voting messages may be a positive thing, but in other chats it may become a nuisance.
Activate the «Remove the message the user votes with» checkbox in your advanced options to combat this.

If you've got a brief chat delay enabled for your Twitch chat, chat will never display the voting messages to your viewers, as Moobot will remove them before chat displays them.
For this reason, we recommend using a chat delay when using this functionality.
Reusing your polls by exporting and importing them
You can export a poll to a file, and then easily import it again later.
This lets you easily make templates for the polls you run often, or pre-making your polls before your stream and then importing them when they're needed during your stream.
With some finesse, you can also edit the exported file to only keep the specific settings you want.
Follow these steps to export your poll:
- Open up the
«Community»menu from the main menu, then open the«Polls»menu from there. - Find your poll in the
«Current polls»list and click the button labeled«Export poll to file»in the poll's table row. - Use the dialog to save the exported poll to a file on your local system.
You can now import the exported settings to a new poll by following these steps:
- Open up the
«Community»menu from the main menu, then open the«Polls»menu from there. - Click the
«Import»button at the bottom of the menu. - Select the poll export file you want to import and then confirm the dialog.
- (Optional) Adjust the settings.
- Click the
«Create»button at the bottom of the menu to make the poll.